The nieces wanted to make paper snowflake holiday ornaments, so I broke out my slightly rusty hand crafting skills and we got busy. When I shared a photo of one of our finished ornaments n Twitter, er Instagram, I was surprised at how many people wanted to know how to make their own. No problem, gang; I’m happy to share.
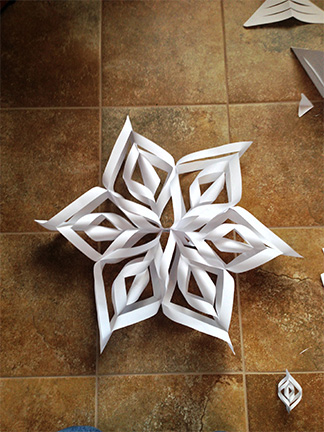
The supplies: Paper, scissors, clear tape, stapler.
You’ll need six square pieces of paper; any color you like. I typically start with letter-size sheets (8.5-inches by 11-inches), fold then at an angle to make a triangle, then cut off the end that’s left sticking out. You need the square folded in the triangle shape for the next step, so don’t unfold it.
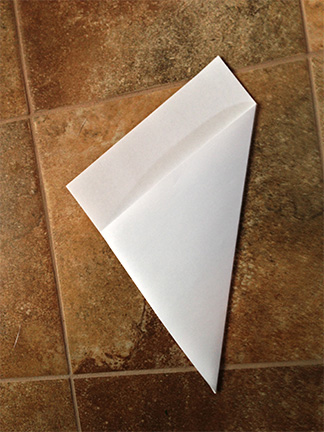
Fold your triangle shape in half to make a smaller triangle, and break out the scissors. It’s time to start cutting.
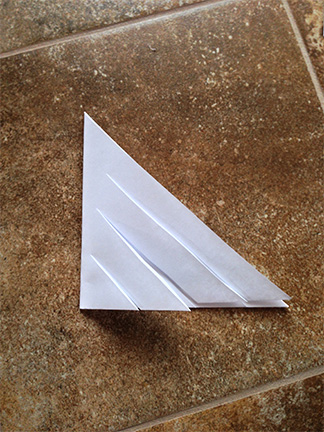
Make three cuts starting from the first fold running parallel to the open edge. Try to keep your cuts about the same distance apart and stop about half an inch from the second fold.
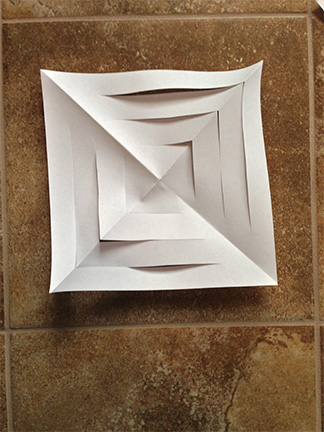
Unfold your paper so it’s a square again and grab the tape. Curl the center cuts together to make a tube, then tape the ends together to hold the shape.
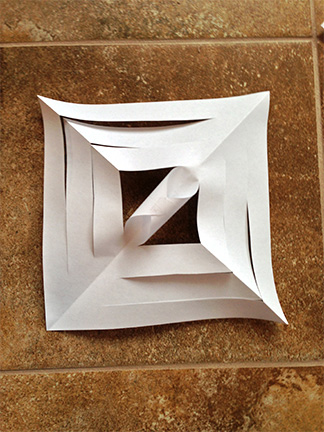
Turn the paper over and curl back the next set of cuts just as you did with the first. After you tape the ends together, turn the paper over and curl and tape again two more times to finish up your first ornament piece. You’ll need to make five more, so hop to it.

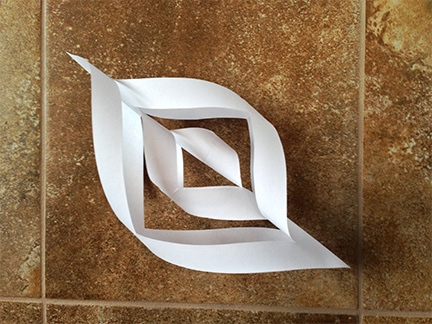
Now take three of the ornament parts and staple them together at one end. Do the same with the other three. If all goes well, you now have two half circles.
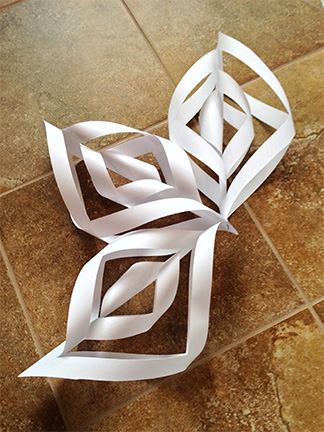
Put the two stapled end together and staple again. Do you have a circle, now? Good. We’re almost done.
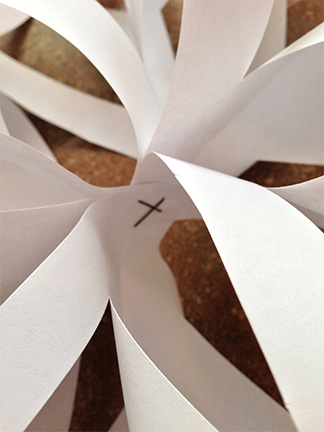
Staple the outer paper arch from each piece together to keep your ornament from drooping. This’ll keep that nice round shape when your ornament is hanging.
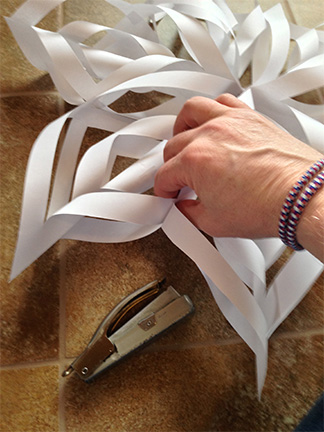
And that’s it. Your 3D paper snowflake ornament is done. The nieces caught on quick and spent two days making and decorating ornaments. I think I need more paper.


We made these today for our Christmas school project! Thank you for posting such great directions!
Awesome! I’m glad they worked out well for you, and hooray for fun school projects!
Just testing some behind the scenes updates for comments.
I attempted to make these with my engineering students years ago. They look awesome when the little buggers followed the instructions. This does not bode well for the future of engineering in the UK! If you make them with holographic paper they really look good.